If your phone is on hand and you are ready to take a ride to the world of ‘scrolling’ then here are detailed steps on how to create an Instagram account. Finalising these steps may give a cool look and feel to your Instagram feed.
Here’s how to sign up for an Instagram account in just five easy steps:
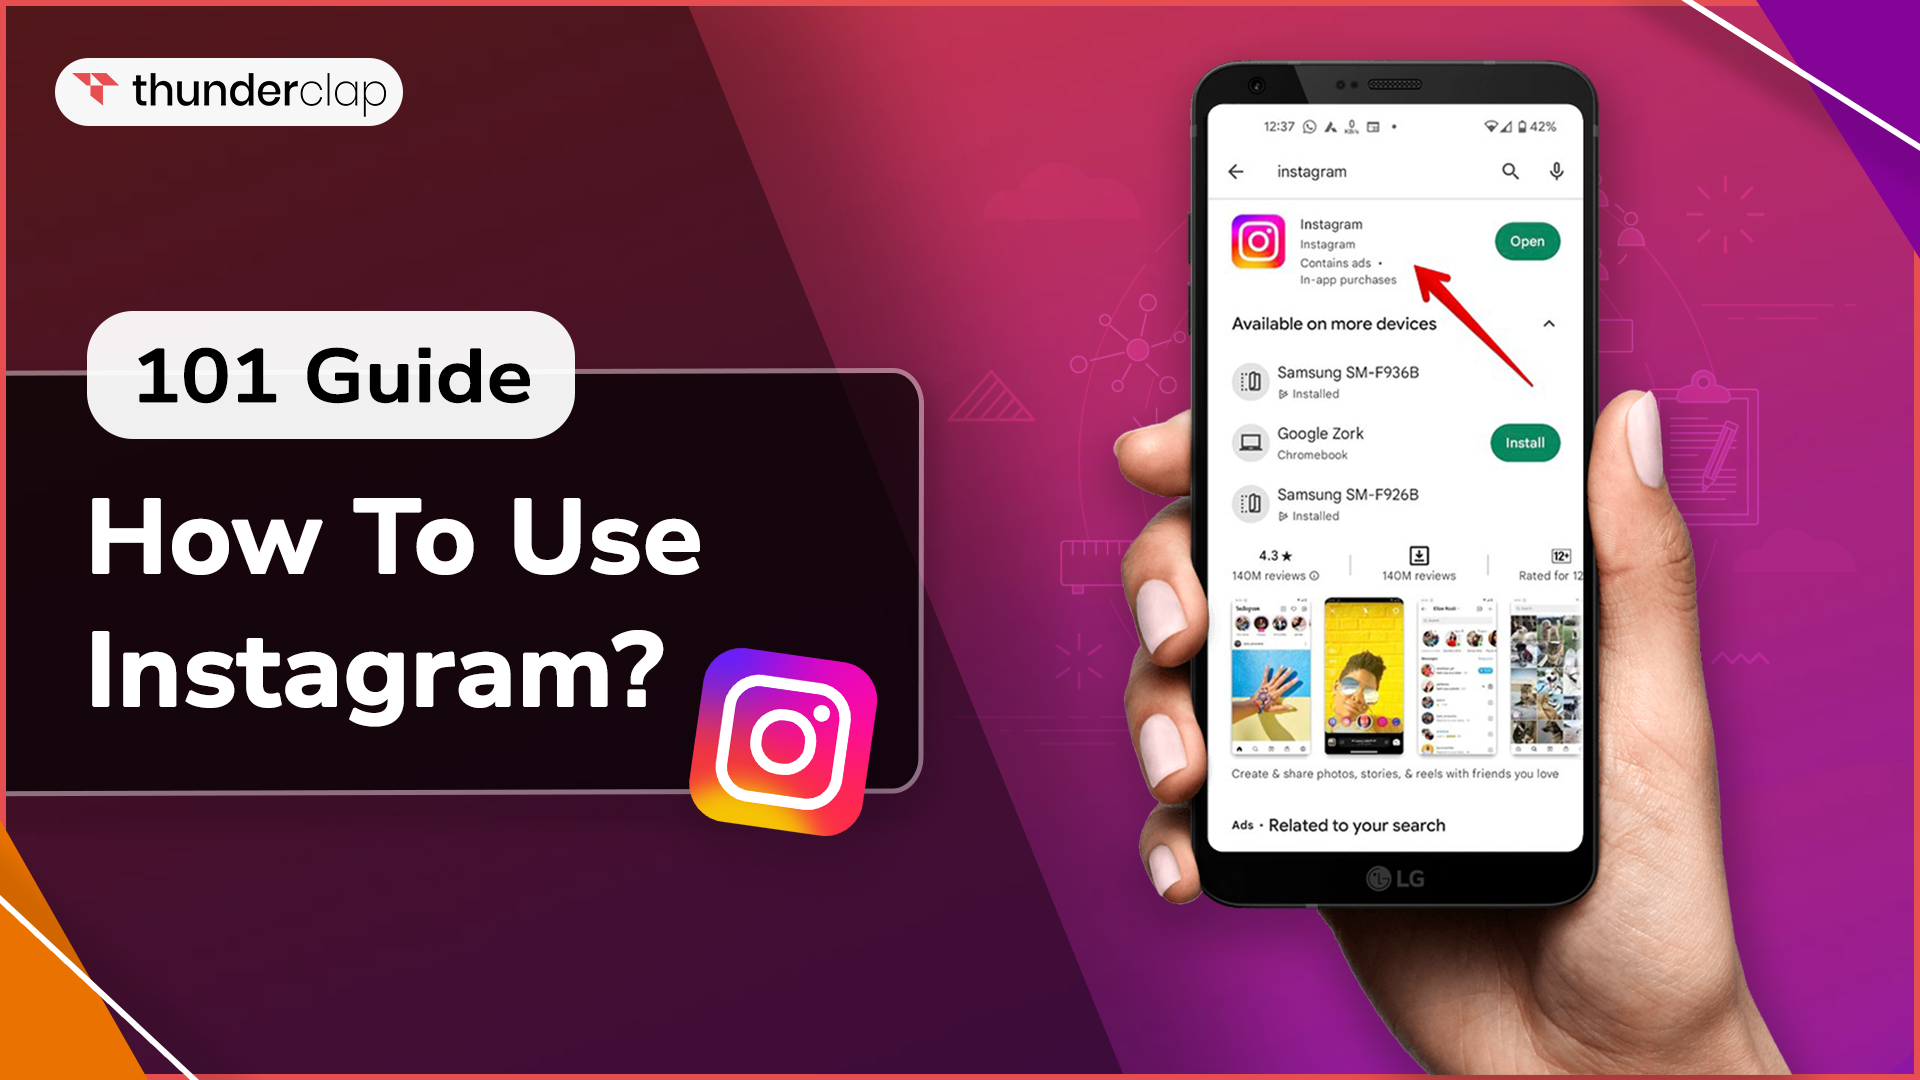
Step 1: Download the app on mobile
You can download Instagram on your Android or iOS machine from the Google Play Store or the App Store, accordingly. In the search field, type “Instagram,” look for the Instagram’s logo, then select “Download.”
To register on a PC, visit this Instagram page and begin inputting your information.
Step 2: Make a username and create an account
You will see the login screen as soon as you launch the app. The “Create new account” button will be at the bottom of your screen. Click it to start a new account.
Instagram will require you to:
Hurrah! Your sign-up for Instagram is done.
Step 3: Set up your profile picture, bio, and links
In the two steps above, your Instagram account is created. However, you must set up your profile in the following ways to make sure that your target audience finds you:
Upload or edit profile pictures
-
To access your profile, tap your image in the upper left corner.
-
Hit “Edit Profile.”
-
Tap “Edit profile image.”
-
“Click “Upload Photo,” then choose the image you want to upload.
Bio
Bio is the first impression that appears beneath your profile picture. A bio can be a phrase, a motto or a thought about life. This lets the other users decide whether to follow you or not. But for that create an engaging Instagram bio of a 150-character limit.
To access your profile, click the photo of yourself on the right.
Links
Instagram gives brands and businesses access to integrate their websites, and Lintree links for people to become aware of their products and services. Through this brands also enhance their visibility and engagement by adding links on their Instagram page.
Let’s learn how to add links:
-
Tap the profile symbol or photo in the bottom right to access your profile.
-
Select “Edit Profile” located at the upper part of the screen.
-
To add the URL for your website, tap “Links” and then “Add external link.”
-
Press “Done.” By first pressing the link and then selecting “Remove Link,” you can quickly delete a link.
-
You can save your changes by tapping “Done” after tapping “Back” (<).
Utilize the website and bio areas to provide prospective clients with further information about your brand if you intend to use an Instagram account for business.
Step 4: Select the type of Instagram account
An account type defines what kind of Instagram page you want to own. This could either be extremely private or public. Let’s explore further to see the differences:
-
Personal Instagram Account: If you only use Instagram to stay in touch with your friends & family, this is the best kind of account for you. Because your profile is closed, someone must ask to follow you to view your posts. In notifications, you have the option to approve or reject follow-up requests.
-
Business or Professional Instagram Account: The best solution for all businesses is an Instagram business account. These accounts are rewarded with extra call-to-action buttons (CTA) such as “Shop Now” to encourage consumers to purchase.
-
Creator account: This is the best choice for those who are content creators on Instagram. Even while this profile type lacks the additional CTA button, it still has elements like a label name beneath your display name that is supposed to assist you in creating a community.
Your Instagram profile is private by default. To change the type of account you have:
-
Select the three horizontal lines in your profile’s upper right corner.
-
Choose “Settings and Privacy,” then “Account type and tools” by swiping down.
-
Selecting “Switch to a professional account” is an option.
-
When you tap it, you’ll be prompted to select a category, such as writer, entrepreneur, or shopping & retail. Lastly, you have the option of selecting a business or creator account.
Step 5: Customize the notification system
Instagram sends you numerous notifications, including when someone follows you, likes one of your photos, tags you, and more.
You can manage Instagram Notifications by navigating to your profile’s settings to change the alerts you receive. Select “Notifications” to personalize the alerts you want to receive and those you don’t. You can also put all notifications on temporary hold or put all notifications on hold for 12 hours by using the “quiet mode.”
The distinction is that message recipients will be aware that you have turned off all alerts when they message you because of your online status. If enabled, auto-replies will indicate this. Nobody knows if you’ve momentarily stopped receiving notifications outside of quiet mode.